How to Build a Lean to Shed Against a House

Last updated November 17, 2021
Recently I was doing some research on how to build a Lean To shed and what the best practices are. If you've already read my post about how I built my first shed, you may inquire why I need another one.
Well, over the last few years the original shed slowly filled up not only with my wife's garden tools but also with the snow blower, generator, winter/summer tires for two cars, and some building supplies.
My wife says it's her garden shed and my stuff is in her way! She showed me a picture of a plastic shed at a box store and told me it would be perfect if I got it for her, and it would be only for her gardening supplies and tools!
What an insult to me as a DIYer! To keep peace in the house and uphold my status as a handyman, I decided to build my wife a much better 4×8 Lean-to shed than any plastic one could be.
This post will guide you through the main steps of building this type of shed from scratch.


Lean To Shed Requirements and Design
I began looking at our property and working out a building plan. I didn't want it taking space that the kids and we use, nor could I put it in the far back corner and keep the peace. I looked at the existing 12×14 shed and the space around it.
The location was awesome, but I couldn't build a stand-alone without cutting down a tree or messing with gardens and sight lines. Adding a lean-to to existing shed would be perfect! I could tuck it against the side wall, the only accessible wall.
The slope of the original shed, however, put some constraints on the Lean-to height, which would also impact the other dimensions. To get a usable height, the shed could only be 8-feet long. If I came out 4-feet, the slope would be about 2/12 – the minimum for low slope asphalt shingles.
The highest the Lean To roof could be against the existing wall was 83-inches. On a 4-foot run that would take 8-inches off at the outside wall, which impacts the door height (I'm 6'-2"…ummm… but my wife is 5'-3"J).
If I made it 4×8, I could use standard dimension materials and reduce the cost. The size would hold all the gardening tools, pots and planters, fertilizers, and maybe even a potting bench! Peace was just a saw-cut away!


Considerations for Building Lean To Sheds
Once I decided what and where to build, it was time to consider other factors affecting the design and placement of the Lean-to. The location of trees, bushes, and gardens I'd already considered, but the effect of frost on attached vs. unattached was equally important. My next decision was attached or free-standing, and did I need a permit.
According to our local regulations we can build 2 sheds less than 144 sq.ft. each on the property without a permit. So if I attach the lean-to shed to the existing 12×14 shed (which I had a permit for) a permit would be required. Check with your local building department; they can be quite helpful.
Local Restrictions:
- Permanent foundation – a permanent foundation has tax implications in many locations
- Auxiliary buildings – some areas may restrict the number of structures allowed on a property
- Size and style – different locations have different requirements regarding the size of outbuildings, the style acceptable in neighborhoods, even color and finishes permitted
- Clearances – some local ordinances dictate the clearances between buildings, property lines, and utilities
Attached to Another Building:
- Hangs on existing wall
- Adds extra space to the lean-to as you don't need to build the back wall, removing existing siding also adds some space
- Only building 3 walls, reduced cost of building a separate back wall
- May be insurance and tax implications as it becomes a more permanent structure
- Frost heave in cold-climates may be an issue *Most house foundations are warm (heated) foundations reaching below frost levels. An unheated foundation may have to be even deeper to prevent frost heave or risk damage to both structures.
Free-standing:
- Easier to move or remove
- Separate foundation so fewer issues with frost heave
- How to water and bug proof a wall built flush to another building, but not attached, if not far enough away to allow air movement
- Building 4 walls increase the cost
- Separate foundation so more building freedom
Foundation Options:
- Concrete slab – a concrete slab is permanent, and makes a great shed floor, but could affect taxes. The structure could just sit on the level slab and still be moveable, so not taxable
- Deck blocks – inexpensive and easy to install, allow airflow under the shed to reduce moisture and rot
- Skid – easier to relocate shed, airflow under the shed, quick and easy to build
- Gravel pad – easy to build, still need to build a floor and lift it off the gravel
How To Build A Lean To Shed: Step by Step
What You'll Need :
- Tape Measure
- 48-Inch Level
- Circular Saw or Miter Saw
- Nail Gun
- Drill Driver/Impact Kit
Step 1: Build Shed Foundation
I decided to go with my favorite deck blocks. I'd used them for the original shed, but had cemented in adjustable 4×4 deck supports to offset any settling issues. This time I'd do it the classic way – without adjustable inserts! It would keep the cost down.

I decided I would only need 2 rows of 3 blocks each to support the floor. The shed wouldn't be very heavy, and nothing heavy would be stored in it, so additional support wasn't needed.

I planned to use crushed gravel under the blocks to help with drainage and leveling. Use a crushed stone that has pieces 3/4" and smaller mixed with gravel dust, it compacts better, is easier to level, and drains well.
Start with the row closest to existing shed:
- Start with a corner block. Dig out the first hole, set in the block and check the elevation of the floor using a 2×6. Make sure the block is deep enough to give the desired finished floor height. Remove the block and dig down a couple of inches deeper. Add gravel to bring it back up to level and replace the corner block, check elevation, and level it side to side and front to back.
- Use the 2×6 to mark the placement of the holes for the next blocks. Dig the next hole in the row, add in the gravel, and place the block. Use the 2×6 to level with corner block and make sure the location is correct. Level it side-to-side and front to back, add or remove gravel to adjust the level.
- Repeat the process for the last block in the row. Once it is set, use the 2×6 to ensure the row is level and where you want it.
The second row:
- Place a corner block, use the 2×6 on the corner block of the first row and locate and check for square. The 3-4-5 rule works well for this size (3-feet along the back row, 4-feet from back to the front row, and 5-feet diagonally connecting the 3' and 4' marks).
- Dig out the hole, set in the block and check the floor elevation using the 2×6. Remove the block and dig down a couple of inches deeper. Add gravel to bring it back up to level and replace the block, check elevation and level with first-row corner block, and level it side to side and front to back.
- Repeat the process for the remaining blocks, checking for location and level from second-row corner block and first row blocks.
- You could do all 4 corner blocks first, then the middle blocks.
I dug the hole, filled it with a couple of inches of gravel, and placed deck block.


I checked the level between blocks and between rows.

I laid out the two beams and checked for level…again.

Here's the video:
Step 2: Building Floor Frame
I choose to build the floor frame using 2×6 single ply beams resting on each row of 3 deck blocks. I'd use Simpson Strong-Tie LUS26 joist hangers to attach the joists to the beams. The hangers would be attached to the beams using 4 Simpson SD9212 screws in each. The Simpson SD9212 screws are code rated for shear-force use.
Pro Tip: Never use roofing nails! The heads often separate when driven against metal. Additionally, they are not shear-force rated for this use!


Step by step process:
- Install the two beams and check for level, adjust if needed.
- Cut and install the two side/end joists.
- Cut and install the middle joist ant the middle deck blocks.
- Mark beams going from left to right – 16-¾, 32-¾, 48-¾… Place an X on the left side of the mark – this is where the joists will be located, at 16-inch centers.
- Fasten the end and middle joists to the beams using galvanized 3"-10d nails.
- Square the frame using the 3-4-5 rule, and check and adjust level if needed.
-
*This is where I decided to lay out some ground cloth to prevent weeds from growing. I covered the cloth with a thin layer of gravel. I wanted to make sure there was space for air to flow under the shed floor to help keep moisture down. I could have done it before building the frame, but making square and level adjustments would have been more difficult.
- Install the joist hangers at the marks on the beams using 4 Simpson SD9212 screws in each (not roofing nails!).
- Cut the joists and place into the hangers.
- Toe-nail the joists through the joist hangers into the beams with 4 galvanized 3"-10d nails.
- Check for square and level…again!
-
-

Pro Tip: Use an End Cut preservative to seal all cuts before assembling the frame.

I seal all saw cuts with a wood preservative.

I laid out the garden cloth and covered it with a thin layer of gravel.

Use 4 Simpson SD9212 screws in each (not roofing nails!) and toe-nail using four 3" 10d galvanized nails.


Once the frame is together, I checked for square and level, and made sure there was space for airflow between the joists and gravel.

Shed Floor
For the floor of the shed, I followed the advice I wrote in the article about shed floor plywood thickness. Pressure treated ¾" exterior grade (CDX) plywood is rot and moisture resistant. The heavier thickness won't sag, and surface defects have been removed and replaced with football shaped plugs giving a smooth surface too.
The single sheet needed for the floor was simple to place and made squaring the frame easy. Use 2-1/2" galvanized nails or treated deck screws – I made sure they were rated for pressure treated use or they would quickly corrode. The nails or screws should be spaced 12-inches apart on the joists and beams. Be careful not to hit the nails attaching the joists to the beams.

Pro Tip: To learn more about what type of fasteners to use for shed building read my post here.
Step 3: Wall Framing
With the floor built it was time to plan, layout, and build the walls. I decided to use the floor deck as a level space to assemble all the wall sections; much easier than on uneven ground. As part of the planning, I lay out the walls on paper so I can also do up a materials list. I hate having to drop what I'm doing and go to the lumber store because I'm a 2×4 short!
I was struggling with the 8-foot front wall layout and trying to limit waste and cost. I planned to use LP SmartSide panel siding which comes in 4×8 sheets. If I framed for a standard 36" door, I'd need 1 full sheet plus a 1-foot strip off a third, leaving almost a full sheet as waste or to store.
To save $45 on a full sheet, I'd need to build a 4-foot door. I could live with that! If I moved the door opening to be off center, with the door closer to one end, and if it was trimmed it could even be narrower, increasing storage potential inside.
In the end:
A 96-inch long wall, less 48" for the 4×8 SmartSide, less door trim – 2 planks 1×4 (3.5") = 7" + ¼ space between doors, leaves a 40-3/4" wide door.
Using 16o.c. framing I'd need 3 2x4s (including the trimmer stud) on each side of the door opening to attach the SmartSide and trim to; that was doable!
Back Wall
The back wall was straightforward framing. Place the top and bottom plate together, mark both plates going from left to right – 16-¾, 32-¾, 48-¾, and place an X on the left side of the mark – this is where studs will be located.
Cut the studs and place them between the bottom and top plates. Fasten the outside studs to form the frame, and then fasten all studs. Square the wall and screw a 2x4x10 diagonally to keep the wall frame square and rigid. I then leaned it out of the way against the existing shed.

Side Walls
The two side walls were also straightforward framing. I just repeated the same steps as used to construct for back wall frame. Place them out of the way.


The side walls were straightforward framing.

Lean the walls where they are easy to get, and so they can't fall and be damaged or injure someone.
Front Wall
Having planned the front wall layout, I placed the top and bottom plates together. Marked where the king studs for the door would go, remembering not to mark for studs between them. Then I marked both plates going from left to right – 16-¾, 32-¾, 48-¾, and place an X on the left side of the mark – again this is where studs will be located.
Assemble the wall frame the same as the other three walls. I added an extra stud beside each king stud. I used two 2x4s with a 7/16" strip of OSB to flesh it out to 3-½" thick for the header. The header for the door goes between the two king studs, and then the trimmer studs get nailed into place. With everything nailed together, move the wall out of the way.

The front wall before the double stud and trimmer stud were added.

The header is two 2x4s with a 7/16" strip of OSB to flesh it out to 3-½" thick.
With the walls all framed, it was time to put them all together. The back wall would be impossible to finish once it was in place, so I had to sheath and waterproof it before raising it into place. LI laid the back wall on the floor platform. Removed the diagonal brace, and placed the 7/16" OSB sheathing so it goes past the bottom plate by 1-inch. I also used the OSB to help square the wall before nailing it on.

The 7/16"OSB was attached to the stud frame (including the bottom and top plate) using 3-inch 10d galvanized nails or screws.
Attach Tar Paper
To protect the "exterior" of the wall, I chose to use tar paper as a barrier against weather and moisture damage. I unrolled the 1st or bottom row and stapled it to the OSB. I left enough of an overhang at both ends to wrap over the 2×4 stud.

I unrolled the 2nd or middle row of tar paper and overlapped the lower layer by about 6-inches. Stapled it down and rolled out the last row. I let it overlap the middle row, so it was flush with the top edge of the OSB and stapled it down. Both rows should be as long as the first row too. Curl the ends down over the end 2×4 studs, and staple to hold.

Walls Assembly
I began assembling the walls with the sheathed and protected back wall. Lifted the wall and used a 2×4 to brace it upright. Aligned it with the floor edges, and used 3-1/2" 16d galvanized nails or coated (green) screws to secure the bottom plate to the floor and beam.

With the back wall nailed and braced into position, I placed the left wall onto the floor. Aligned it with the floor edge and back wall, and fastened it to the floor and joist using 3-1/2" galvanized nails or green screws. I used the same fasteners to connect the end studs of the two walls. Plumbed and braced the walls.

I moved the right wall into place. Aligned the bottom edge and the back, and used 3-1/2" galvanized nails or green screws to fasten it to the joist and the back wall. Plumbed and braced as with the left wall.

I lifted the front wall into position; aligned it with the floor edge and side walls. Fastened the bottom plate to the front beam, and then to the side walls using 3-1/2" galvanized nails or green screws.
I cut the top plates for the two side walls so they overlap the front wall. Used 3-inch nails to secure the top plates into place. The overlap ties the side wall more securely to the front wall.

Step 4: Building Lean To Roof
I live in a snowy climate, and the lean-to roof slope gave me some concerns. The ideal roof slope for the climate is 5/12, or better. That means for every 12-inches (or foot) the roof runs; it goes up 5-inches. The steeper the slope, the faster it sheds snow, ice, and leaves, so less build-up.
The best I could do was a 2/12 slope. Any greater and even my wife would have to duck going in! The roof is narrow enough, and close enough to the ground, that if snow build-up got too great, I could use a snow rake to remove it. Plus, it wasn't a big roof with the trusses/rafters unsupported for a long distance.
I checked the options for finishing the roof. The house and original shed had asphalt shingles, and I planned to use matching shingles if I could.
Material options :
- Asphalt shingles: manufacturers recommend a 4/12 slope or greater for asphalt shingles. The minimum rating is 2/12, and the shingle should be labeled "Low Slope". The least expensive option, but only warrantied for 10 to 15 years.
- Metal: low slope metal roofing is usually sheets of ribbed metal, known as standing seam, that are rated for slopes as low as ½"/12. It's more expensive than asphalt shingles (between 2 and 8 times the cost) but longer lasting and is warrantied for 25 or more years.
- Composite: composite shingles are more durable than asphalt shingles and are resistant to UV, mold, moss and algae damage. They are often made partly with recycled materials, and are even fire resistant!
More expensive than the cost of steel roofing, and depending on the grade of composite shingle 8 to 32 times the cost of asphalt shingles. However, it is warrantied for 30 to 50 years.

Warning: Never use asphalt shingles on a slope less than 2/12!
It's recommended that galvanized 10 to 12 gauge nails with a 3/8" head be used. The nails should be long enough to go 3/4" into the wood of the roof deck too. The nail head should sit flat and flush with the shingle when driven in.

Lean To Roof Framing
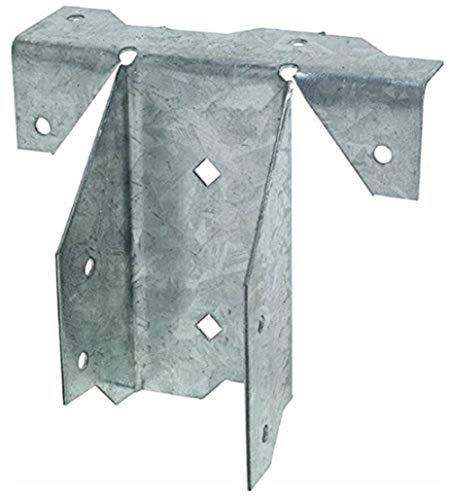 To maximize the back wall height, and due to the roof overhang of the existing shed the lean-to butts against, I decided to attach the rafters to the double top plate using Simpson Strong-Tie ridge rafter connectors. The 2×4 rafters would be sheathed with 19/32 tongue and groove OSB, and then I'd use asphalt shingles to finish the roof.
The ridge rafter hangers may be secured with the Simpson Strong-Drive SD Structural Connector screws or galvanized 1-1/2" and 2-1/2" 8d nails.
The rafters were attached to front wall top plate with Simpson Hurricane Ties and secured with the Simpson Strong-Drive SD Structural Connector screws or galvanized 1-1/2" and 2-1/2" 8d nails.


Step-by-Step process
I used the practices laid out in my article about shed roof framing to calculate the length of the rafters and to layout and cut the angles of the birdsmouth. Once a pattern rafter was cut, it was used to mark all the remaining common rafters. For short rafters, it may be easier to set one in place and use a square to mark the cuts, and then use it as a pattern after making all the cuts.
Select the Lumber
To select the lumber for the rafters I use a Rafter Span Table to determine the spacing and dimension lumber for your rafters. The dimension lumber needed for the rafter is determined by the span or unsupported distance the rafter must run. For my lean-to 2×4 lumber at 16"-centers are acceptable as the distance is less than 5-feet.
Determine Length and Spacing
The length of the rafter from the front edge of the back wall double plate to the front edge of the double plate of the front wall I calculated using the total rise and the total run it traverses. A bit of middle school math called the Pythagorean Theorem and a calculator, or use a construction calculator, or a free one online rafter calculator, to help determine the length. This also identifies where the notch or back of the birdsmouth begins.
To calculate the length of the rafter I multiply the (rise x rise) + (run x run), find the square root, and I have the distance the rafter must span – remember to use the same units! For my rafter it was (8"x8") + (48"x48") = 2368", find the square root and the span is 48.66" or 48-21/32"+/-. This is rafter length before adding the extra distance for the eave overhang.
The acceptable spacing according to the Rafter Span Tables can be 12" or 16" with 2x4s. I chose 16" centers so the rafters would sit over top of each of the studs, improving the load transfer and increasing the roof support.
Cut Plumb Angles
To calculate the plumb angle for the rafter ends and the birdsmouth I use a framing square.I layout the cut for the ridge end of the rafter first, and then mark where the birdsmouth begins. I set the long arm of the square against the bottom side of the rafter at 12", and align the short arm with the top corner of the rafter end. Keeping the 12" and corner reference, I gently slide the short arm down until it sits at the bottom edge of the rafter at the desired rise of the roof – 2"s for my roof. I double check the 12" and corner reference and the rise reference and draw a line from the upper corner down the short arm. That is the plumb line for the rafter cut.
Mark and Cut a Birdsmouth
The location of the back of the birdsmouth that hooks over the top plate of the outer wall is where the mark for the length of the rafter is. I draw a plumb line on the rafter at that mark similar to the ridge end of the rafter.
The minimum thickness of the rafter sitting on the top plate according to most building codes is 1-1/2"s. However, the rule of thumb is that the cut should not be deeper than a third of the thickness of the rafter. For a 2×4 rafter that would be 1-3/16"s deep.
I use the building square on the underside of the rafter with the short arm down. I move the inside of the short arm up the plumb line from the rafter bottom to the desired depth – checking the square is aligned on the plumb line. I mark a line along the rafter where the underside of the long arm of the square sits. The two lines form the cut out for the birdsmouth.
I determine the length of the overhang or eves, and align the square to similar to cutting the ridge end of the rafter and mark the cut for the tail of the rafter.

The rafters cut, notched, and ready to install.
The two end clips for the side rafters have one wing cut off – make sure to cut off the left from one clip and the right from another clip.


I installed the rafter clips at 16-inch centers, above each of the studs. Securing the rafter hangers with 2-1/2" 8d or 10d galvanized nails or 2-1/2" Simpson SD Structural Connector screws.
I placed the rafters into the clips and fastened them with 1-1/2" 8d galvanized nails or 1-1/2" SD Connector screws.

I could have attached the rafters to the front wall plate using 16d (3-1/2") nails to toenail them into place. Instead, I used Hurricane Ties to secure them and to prevent any wind lift, also less chance of splitting the rafter. 2-1/2" and 1-1/2" SD Structural Connector screws fastened the Ties to the top plate and the rafters respectively.


To secure the two end rafters I used "L" brackets with 1-1/2" SD connector screws.

Step 5: Install Roof Sheathing
For sheathing a roof either plywood or OSB are fine. The building code sets minimum thicknesses based on snow load and rafter spacing. I used 19/32" T&G OSB, it's less expensive than plywood, plus I had half a sheet left over from another job! (I never throw out wood that could be used someday!)
I tacked the fascia into place and used clamps to hold the bottom sheet of sheathing in place after aligning it. I measure the next piece, cut and slid it into place. Because the lean too was tight to the existing shed and its roof overhang, I secured the upper piece first. The lower piece was easier to slide up into the groove channel from below. I removed the fascia so it wouldn't be damaged if I needed to persuade the lower piece into the groove. Use 2-1/2" (8d) galvanized nails to fasten the OSB to the rafters.


I cut the roof felt on the ground, ensuring it had about 4 to 6 inches extra at both ends. Rolled out the first row, stapled (use stainless steel staples) it into place. The second row I rolled out, so it overlapped the first and stapled too.
I could have used a self-adhering roofing membrane, but size and cost were determining factors.


Step 6: Install Siding
LP SmartSide panels or T1-11 panels? What's the difference?
T1-11 panels came out in the 1960s and are plywood based panels that have grooves cut into them. They look like board and batten siding on a vertical application, or shiplap siding on the horizontal.
LP SmartSide panels look like T1-11 panels but are made of OSB based material. However, the OSB strands are coated with zinc borate and then fused together with a resin mixed with marine wax. The panel more water and insect resistant than T1-11. The panel is then given a resin-saturated Smart Guard overlay for painting and protection.
The SmartSide panels are also less likely to develop cracks or layer separation than the T1-11. One other side issue, porcupines like the glue in the plywood T1-11 panels, but don't like the resin in SmartSide panels.
I decided to use LP SmartSide panels which are 3/8-inch 4×8 sheets. I could have used vinyl siding, but time and cost were determining factors. I needed 3 SmartSide panels which cost $45 in my local store, vinyl would cost $220 -$280, and I'd still need to sheath it! Time and money!

To make installation easier, I attached support for the side panels 1-1/2" below the bottom plate. I stood the side sheets up and used claps to hold them in position while I marked them for cutting.

The manufacturer suggests applying glue to the studs for added adhesion strength. They recommend that 1-1/2" screws or 2" galvanized nails be used and spaced every 12-inches. All cuts should also be painted, and all openings sealed or flashed to prevent moisture damage.

I used construction grade adhesive to add strength to the SmartSide panel fastening.


With the SmartSiding attached, I installed the wall-roof trim on the side walls flush to the roof sheathing and fastened the fascia board into place. I then trimmed the roofing felt so the flashing and drip edge could be installed.
Fascia and Rake Fascia
Before installing the flashing, the rake fascia (gable end fascia) had to be fitted and cut. I marked the angles with a speed square and cut the back end. I held the rake board flush with the roof deck, verified the front angle and length for both ends, and then cut both rake fascia boards. I use 8d galvanized nails to secure both rake fascia boards into place, and the fascia board to the front of the rafters.
I installed the drip edge on the front side first and used aluminum nails to fasten it. It should go under roofing felt to allow the roof to shed moisture properly.

The drip edge on the side walls goes over the roofing felt and is fastened using aluminum nails.

Trim or bend the drip edge at the corners for a more weatherproof finish.

The roof is now ready for shingling!
Step 7: Install Shingles
I choose architectural roofing shingles to match the other buildings on my property. Using a scrap piece of sheathing as a cutting board, I trimmed the tabs off three shingles – enough to do the first row at the drip edge. The trimmed strips were installed upside down, so the sticky side was up, and secured with 1-1/4" roofing nails so 3/8" overlapped the front of the drip edge.
I trimmed the tabs off another 3 shingles and nailed them upside right on top of the upside down shingles as a starter strip. Offset the next row by 1/3 of a shingle to protect the seams and nail the next row into place, keeping it aligned with the chalk line. I continued shingling the roof using a chalk line to keep the rows straight.

The tools for shingling a roof are fairly simple, a hammer, a metal speed square, chalk line, knife, and shingle nails.

Trim the tabs off enough shingles to do the first row twice. One set goes upside down, and the other set goes upside right on top of the first set as the starter strip. The first full shingle is offset by a 1/3rd and nail into place.


Install the second set of tab-less shingles upside right on top of the first set.

Finish shingling the roof, off-setting each row from the previous row by 1/3rd of a shingle.
Seal the gap between the roof and back wall with a polyurethane sealant.

Step 8: Install Trim
I sanded 1x4x8 lumber to use for the trim, the same as I'd used for the fascia and rake fascia. I cut the pieces for the front corner trim first so the front board would overlap the side board. Angle cut the top of the side trim boards, then marked and cut the length. I used 8d galvanized nails to attach the trim through the SmartSide and into the studs. One nail every 12-inches beginning 2-inches from the ends to avoid splitting.
The back two corners I trimmed and nailed the same as the side of the front corner. The trim on the door opening was straightforward. I installed the header trim 1-inch above the door opening and made it long enough to overlap the top of the side casing trim. I measured and cut the casing trim, butted them under the header trim, and nailed the door trim the same way the rest of the trim was installed.

Prime the Trim
With all the trim attached, it was time to prime it for painting. A brush for edging and a roller for the face make quick work of the task.


Step 9: Caulking
To better weatherproof the trim and shed, I caulked the trim seams with a good outdoor paintable caulking.

Step 10: Paint Siding and Trim
With the trim primed and caulked, it was time to figure out what kind of paint to use. The siding was prefinished, but it could also be painted any color you choose. An acrylic latex paint designed for wood composites is highly recommended if painting the SmartSide panels. It worked great on the primed trim too.


Step 11: Building Double Door
The finishing touch was the double shed door. Having built them for two previous sheds, I decided the tried and true would be best. I'll give a brief explanation and save the detailed explanation for a separate article on how to build double shed doors.
I used tongue-and-groove 9/16"x6"x8' pine boards to make the two 20-1/4"x168" door panels for the 40-3/4" door opening. Each board was glued at the groove, and the panel reinforced with 3 horizontal and two diagonal battens on the back side of the door, making the outer face nice and clean. I made sure the diagonal braces pointed down and into the hanging jamb.

Once the door panels were built, I sanded, primed and painted them the same color as the shed siding.


Step 12: Install Shed Doors
The hardware is common spring-loaded gate hinges. For added security, I use 2 galvanized bolts per hinge, one in the hinge plate and one in the tee arm. I also add a hasp and lock to keep it closed so little hands can't get at something that could harm them.


I hope you enjoyed this article and it was informative and interesting. If you know someone who is planning to build a lean-to shed, please share with them. Your feedback and comments are greatly appreciated. Remember to check back soon for our article on how to build shed doors.

Eugene has been a DIY enthusiast for most of his life and loves being creative while inspiring creativity in others. He is passionately interested in home improvement, renovation and woodworking.
How to Build a Lean to Shed Against a House
Source: https://plasticinehouse.com/how-to-build-lean-to-shed/